Why make a Dashcam?
I think I had seen too many of those “idiots in cars” videos at the time, so this prompted me wanting a dashcam. It would’ve been a lot simpler (and overall cheaper) to just buy an actual one outright, however, I’m cheap when I can be and I already had all of the hardware that was needed for this project.
There are several controls here for the dashcam’s storage, to actually start and stop a recording, status lights, and buttons to shut down the device or start a web server. I will explain how all of these work later on.
Hardware
Components Needed
Adafruit has 90% of these materials and I got the camera module off Amazon:
- 1x Pi Zero (wireless or not, but wireless is easier to work with)
- 2x SPST/SPDT switches
- 1x DPDT switch
- 2x LEDs
- 2x 220-330 Ohm Resistors
- 2x 6mm ‘Click’ Button
- 1x 8mm ‘Soft’ Button
- A Breadboard or Perfboard to cut up
- I think this is the same camera as the one I bought many years back
- Optional piece would include a Micro USB breakout board
- Other materials include wire, solder, soldering gun, etc.
- Lastly, some M2/M2.5/M3 screws and whatever windshield mount you choose
The Case
I designed this case using MatterControl and the file is available for download here on Github or here on my Sketchfab account. There are four main parts to the case and the rest of the pieces fall into place where you would expect. That all looks like the following:
Connecting everything together
From a high-level overview this is what the circuit should look like. Notice the LEDs are not line with any part of the switches, they are dealt with separately within the script since they need to blink on occasion for different staus notifications. The diagram is fairly straight forward I think:
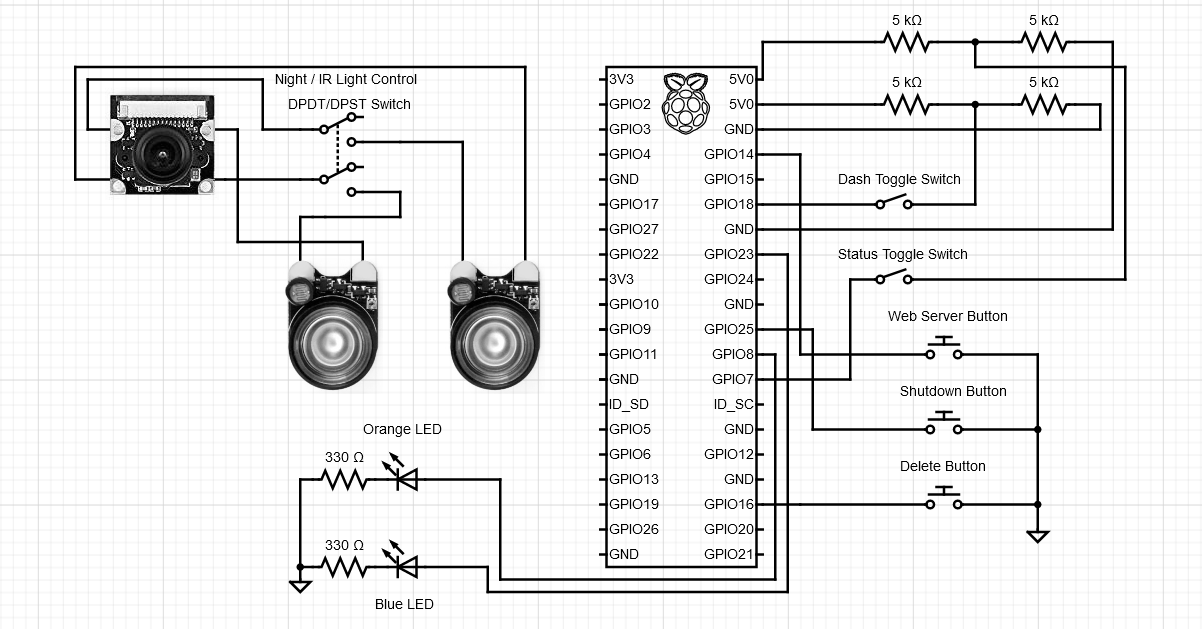
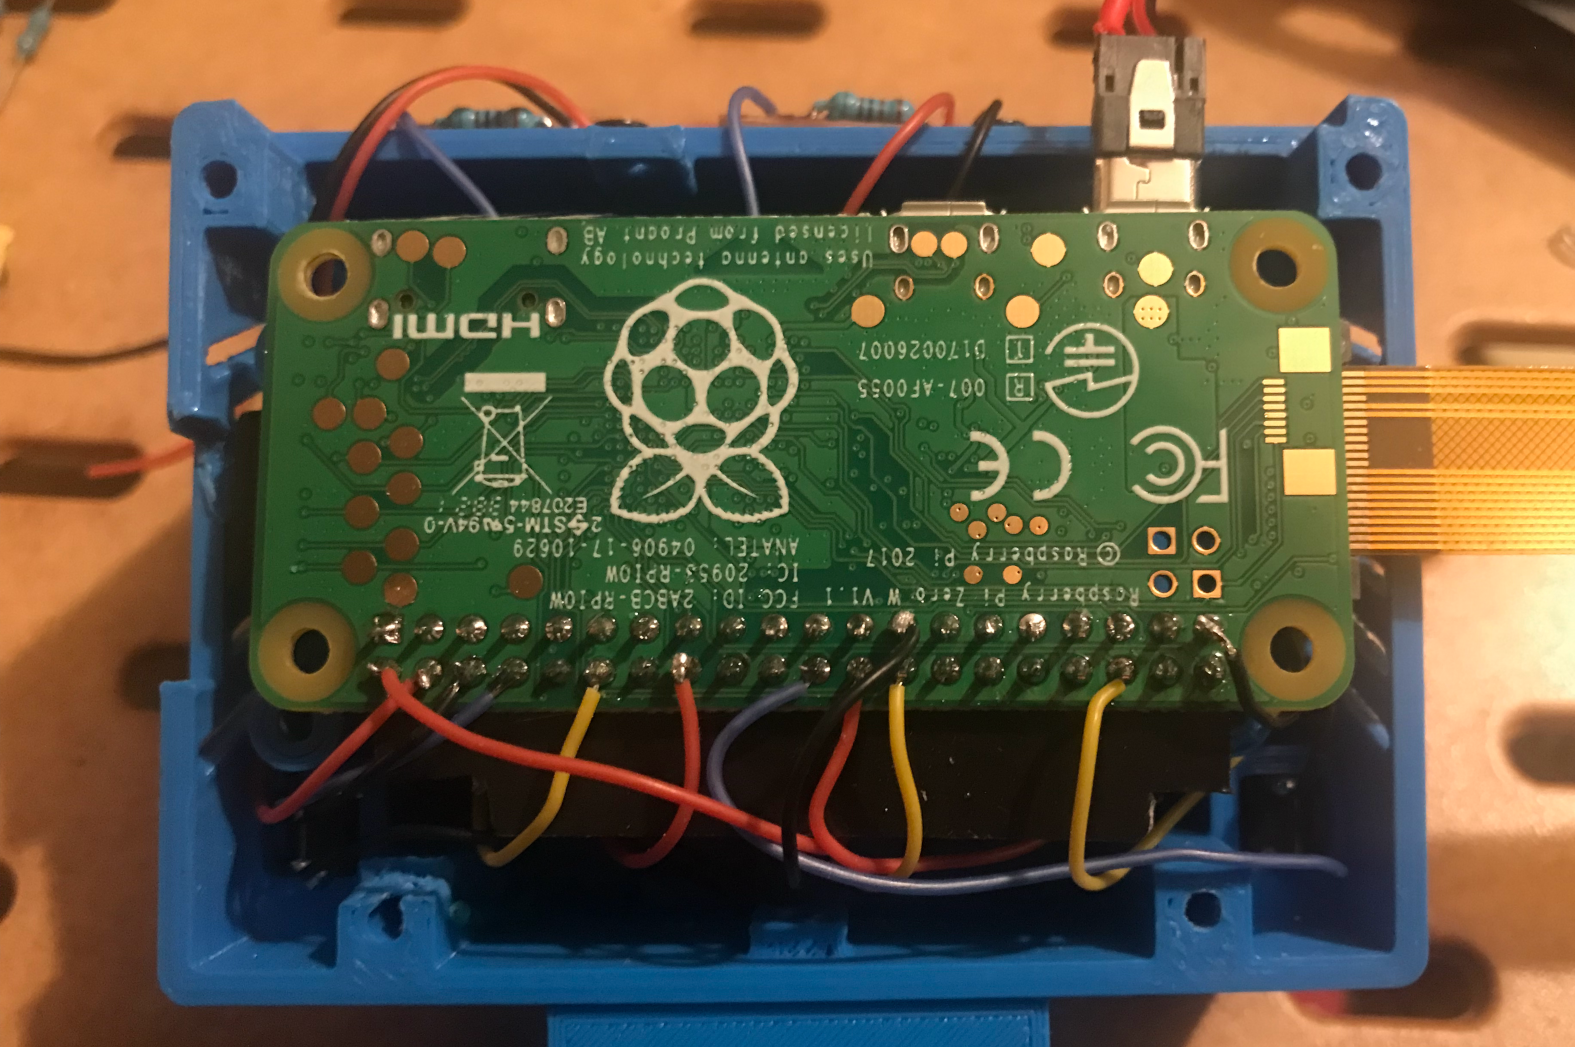
What this looks like all put together is:
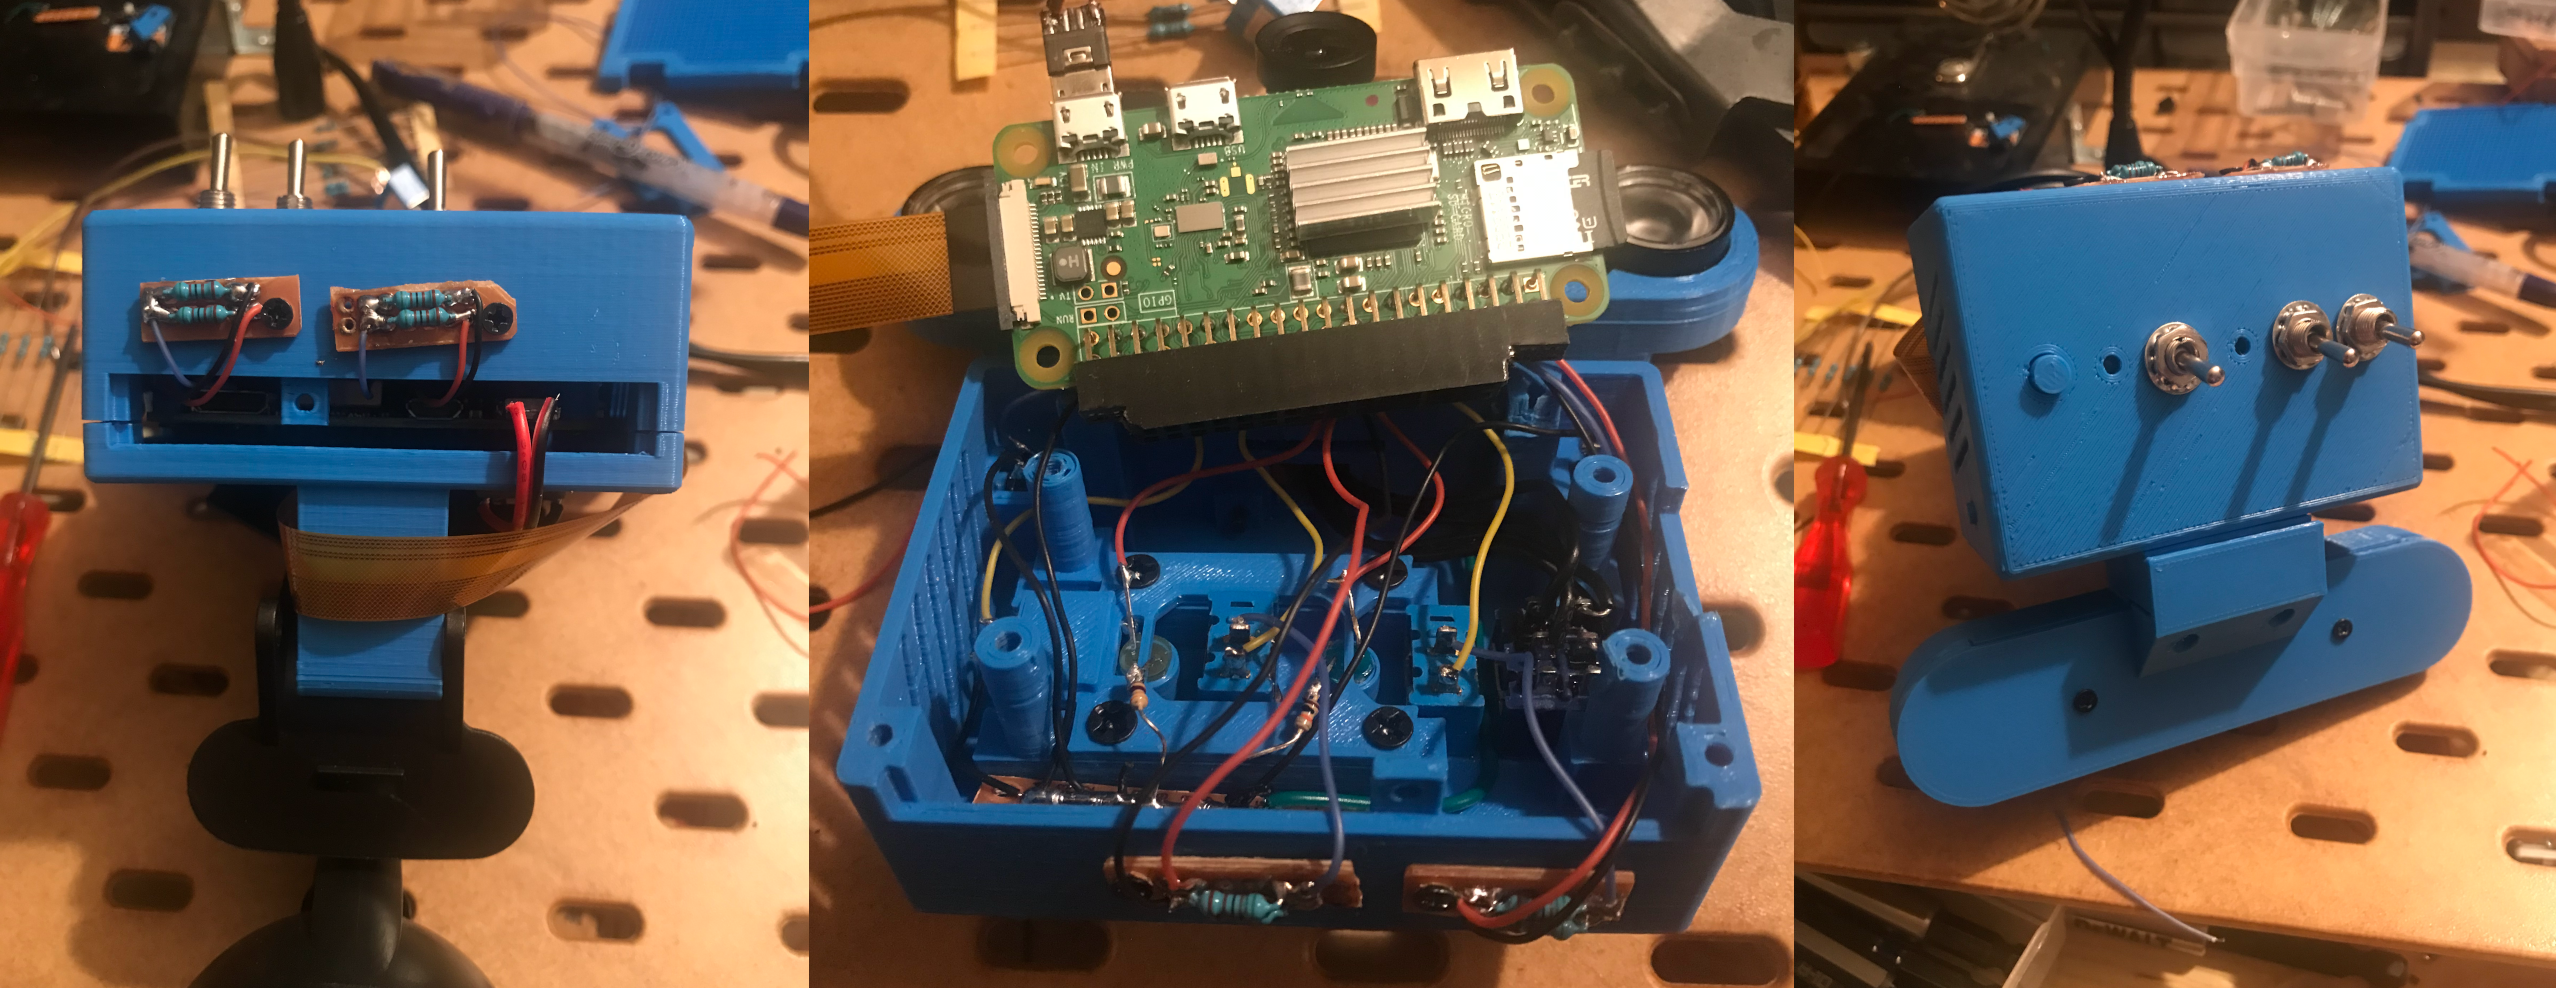
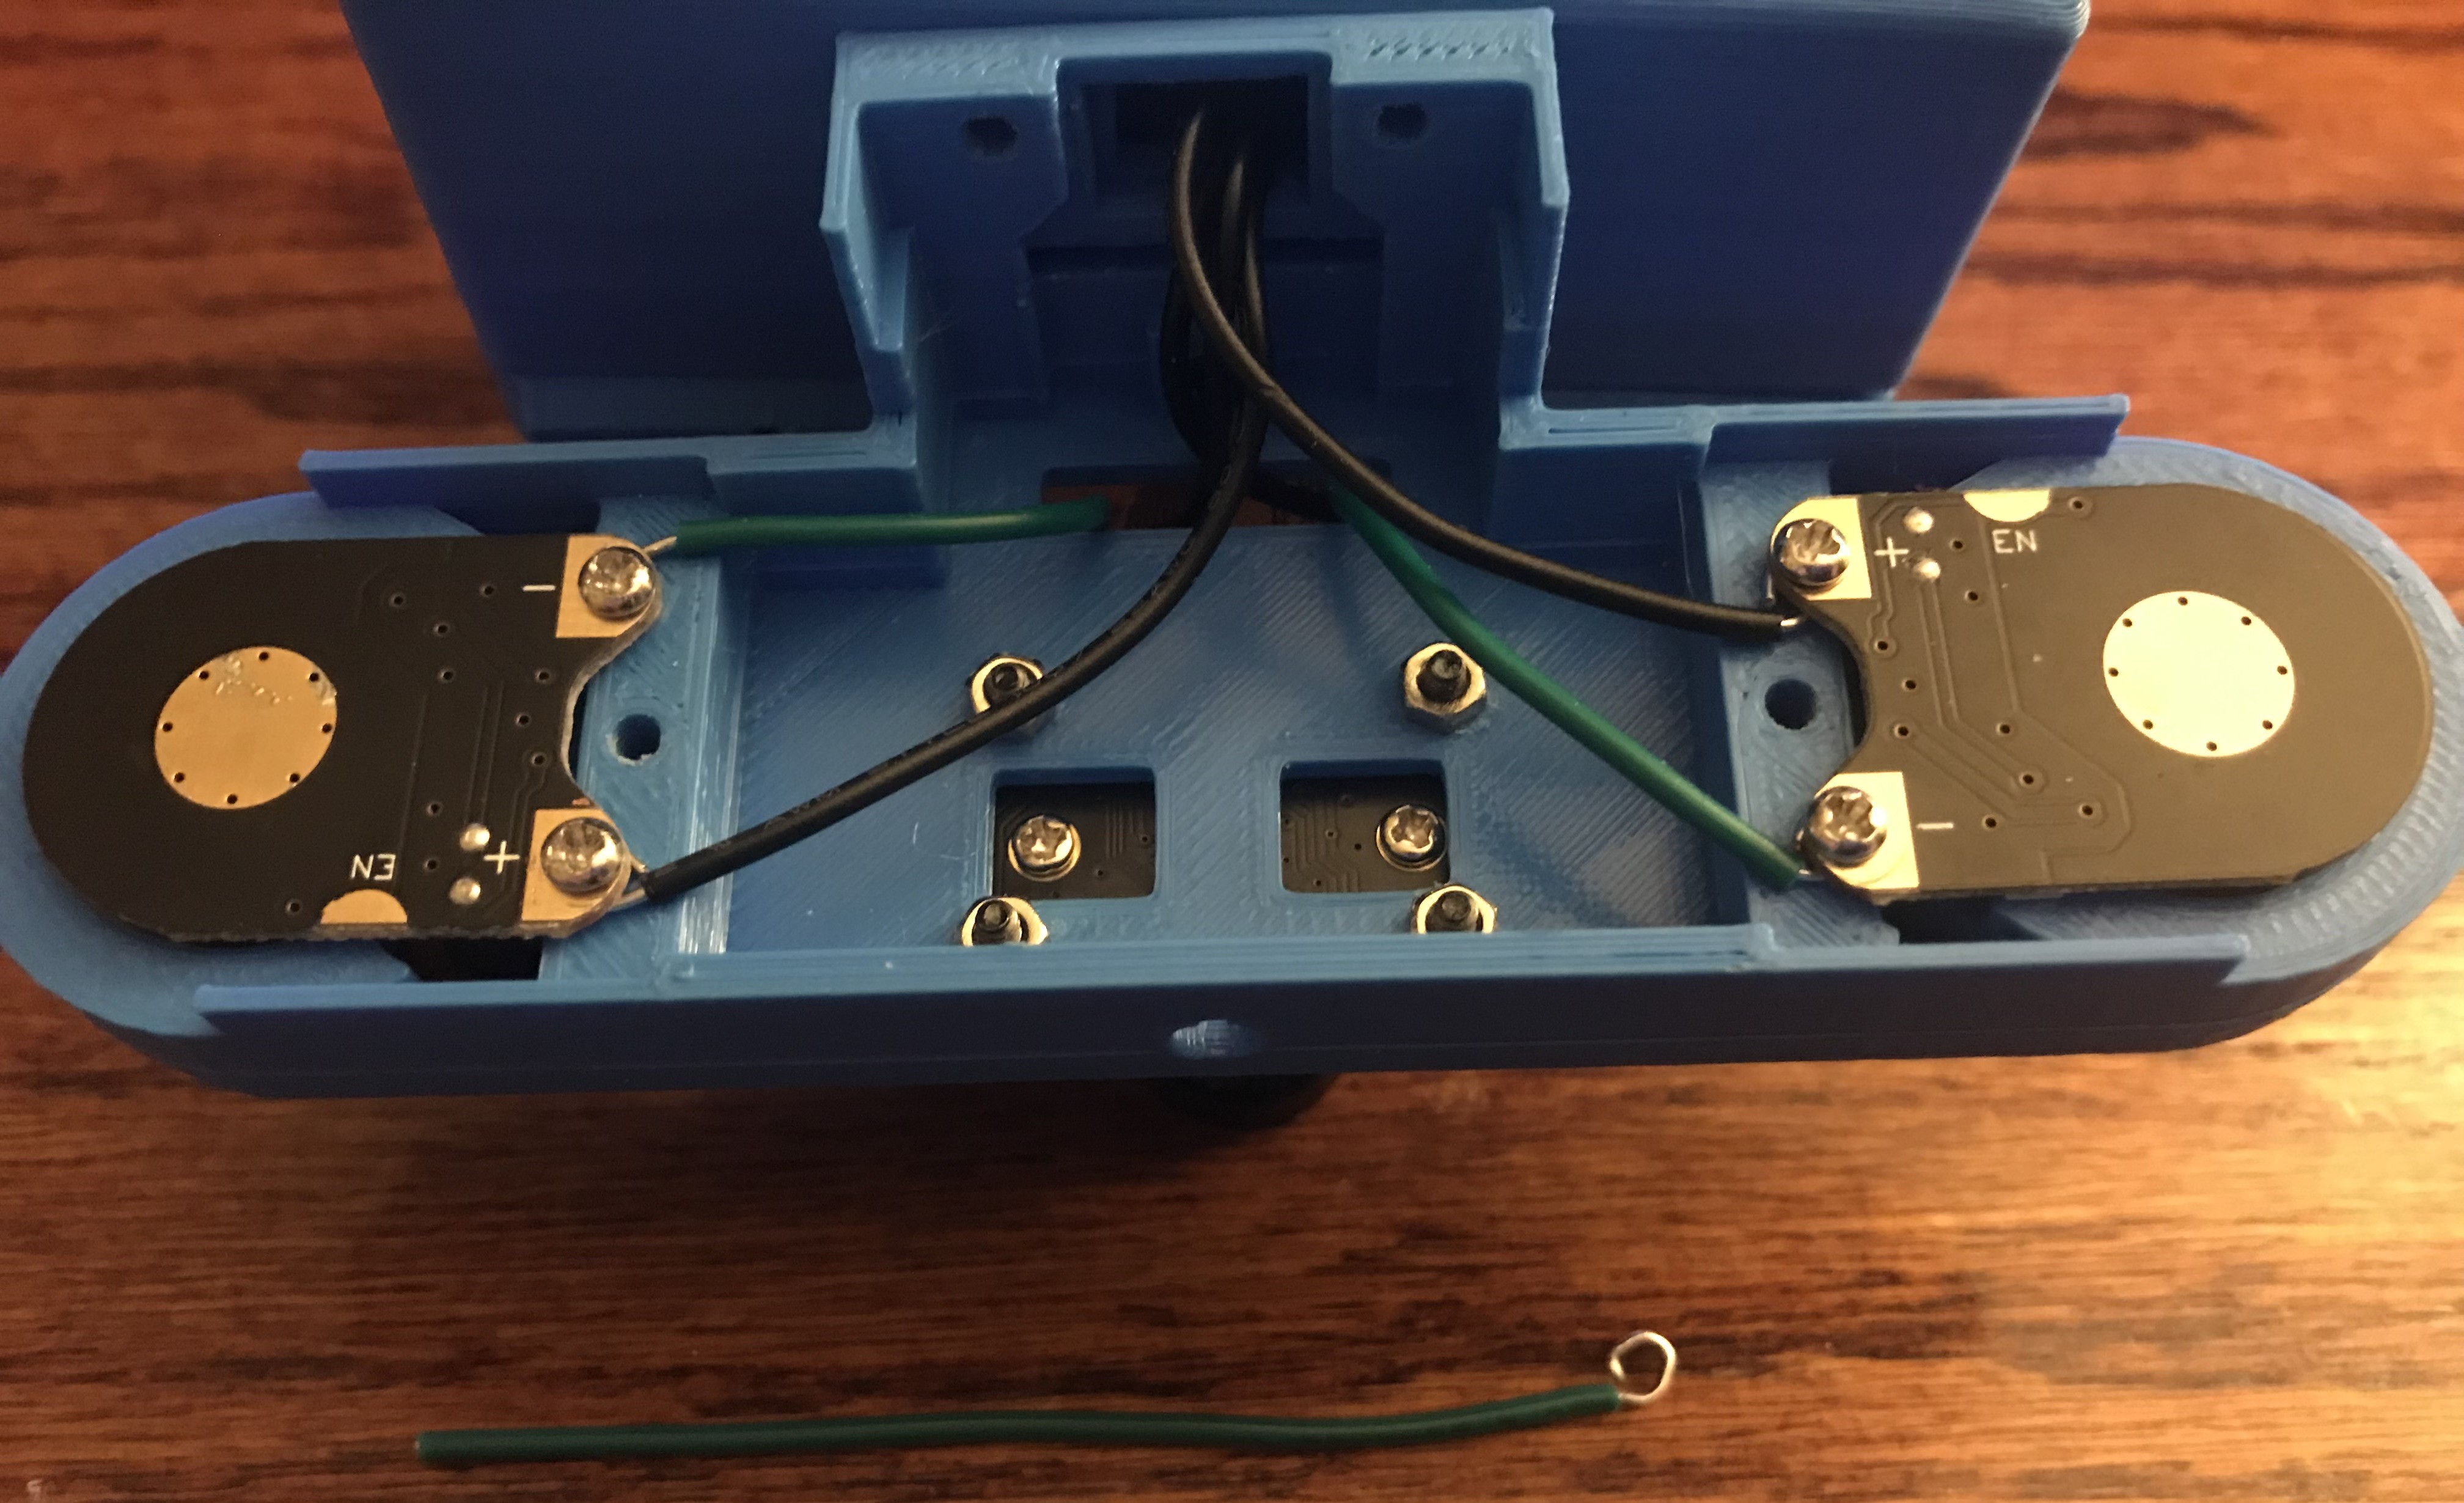
Here’s a step-by-step assembly:
Software
OS
Just go with the default Raspbian Desktop - you can easily flash the SD card with their tool here. This is obviously very compatible with the Pi board and has most things you will need already pre-installed.
Update the OS with sudo apt-get update and sudo apt-get upgrade.
At the terminal enter sudo raspi-config, navigate to interfaces, then enable legacy support for the camera. This will require a reboot and the camera should then be working. If the camera does not work for you the issue is likely user error - i.e. check the cables and ensure the metal connectors are oriented in the right direction. This has been the cause of 90% of my issues when using the camera module.
I would also recommend enabling SSH / VNC on raspi-config for easier management down the road.
Libraries needed
At the terminal go ahead and install the following library with pip install board.
The PiCamera library should already be installed, but if it’s not use sudo apt-get install python-picamera python3-picamera to do so.
Setting up files and folders
At the terminal navigate to your desktop and execute mkdir save and touch count.txt | echo "0" > count.txt. This will create the folder to save your recordings and the count.txt file will track the recording number.
Now to install my script used for the dashcam. At the terminal navigate to the current user’s home directory with cd ~, then execute curl https://raw.githubusercontent.com/fe-moldark/wesleykent-website/gh-pages/assets/dashcam/dashv3.py > dashv3.py.
Configuring the crontab
Since we want this script to run whenever the dashcam is turned on we need to configure the crontab, although there are other options like using the .bashrc and rc.local files. To navigate there, enter crontab -e to open the crontab editor and navigate to the bottom of the file and insert this line of code: @reboot python3 /home/pi/dashv3.py.
After saving and exiting this will install the new crontab so that every time the pi now boots up it will run the dashcam script.
The script itself
I won’t cover what the script is doing line by line since I have more or less already done that in the comments of the script. The only section you might want to customize is over what port you will host the web server. It’s all in Python, so very human-readable. That script can be found here.
Basic Operating Instructions
Switches
- The far right switch is the DPST/DPDT one that provides power to the IR lights when the switch is “up” - have this turned on when it’s dark outside.
- The center switch controls the dashcam recording state. Once flipped up, it will start the recording and the blue LED on its left should turn on as well. Flipping this sswitch off will result in the recording being stopped, then saved after around a one second pause.
- The far left switch is used to turn on the status light and prepare to delete old recordings. Once the light is on, pressing the button left of the orange LED will delete all recordings saved in the recordings folder. This is used to free up space on the RPi. It is also important to note that this can only be done when the dashcam is not actively recording.
Buttons
- The button on the outside left part of the dashcam will conduct a clean shutdown of the system, it’s better than just pulling the power after all.
- The opposite button on the right outside part of the dashcam is used to start a webserver at the default user’s home directory. This is an efficient way to simply plug in the pi back home and be able to access the saved recordings in that way. Once pressed, go to any web browser on a device and navigate to the correct address and port. For me, I statically assigned that Pi to always have an IP of
192.168.11.7and served over port7777. Accessing the files is as simple as navigating tohttp://192.168.11.7:7777, or whatever you choose. Pressing the same button again will kill the process that is running the server. I also have SSH / VNC configured, but this method is simpler.
Meaning of the LEDs
- When the script first starts both LEDs will turn on for a second, then back off to let you know it has started.
- The orange LED will then flash between 1-4 times, indicating roughly how much storage is left on the device. Think of each blink as representing 25% of the storage - a lower number of blinks means a lower amount of storage remaining.
- If the LEDs ever begin alternating blinks this means you have reached maximum storage and you must delete old recordings before you can start a new one. I chose to not auto-delete recordings because the laws of nature dictate that the second you would get into an accident it would reach that threshold and delete your recordings. We all know that would happen.
- On normal operation a steady LED turned on will indicate that one of the switches have been flipped up. It is worth noting that only ONE of those can be on at once - there are reasons for this, but they don’t matter here.
Final Thoughts
If you choose to include a backup battery for use as a UPS or primary power, go for it. The reason I did not do that for mine is because of how hot vehicles can get in the summer, and I for one prefer to avoid exploding lithium ion batteries. But maybe that’s just me. If you do go in the direction of using a battery you should consider other ways to reduce how resources are being wasted - one example off the top of my head would be going into the raspi-config settings and starting the pi into the CLI and not the desktop, but there are other ways too. One other thought, the night IR lights do work but are more oriented towards use if you want to leave the dashcam on overnight. Normal driving (even at night) will have more than enough illumination with your headlights on. Best of luck setting this up on your own if you choose to do so, if you need any help with diagnosing issues on your end you can always contact me here. I’ll happily get back to you. Have a good one.