Intro
I’ve ended up adding on several components to my 3d printer setup. This includes running OctoPrint on a Pi3 B+, an Arduino for temperature monitoring, a fan and filter for the enclosure when printing with ABS filament, and the enclosure itself with an added LED strip on the inside. I have already designed some of the cases for all of these projects while others remain unfinished, so some sections might remain incomplete until updated.
The enclosure
To start off, here is what my enclosure looks like:

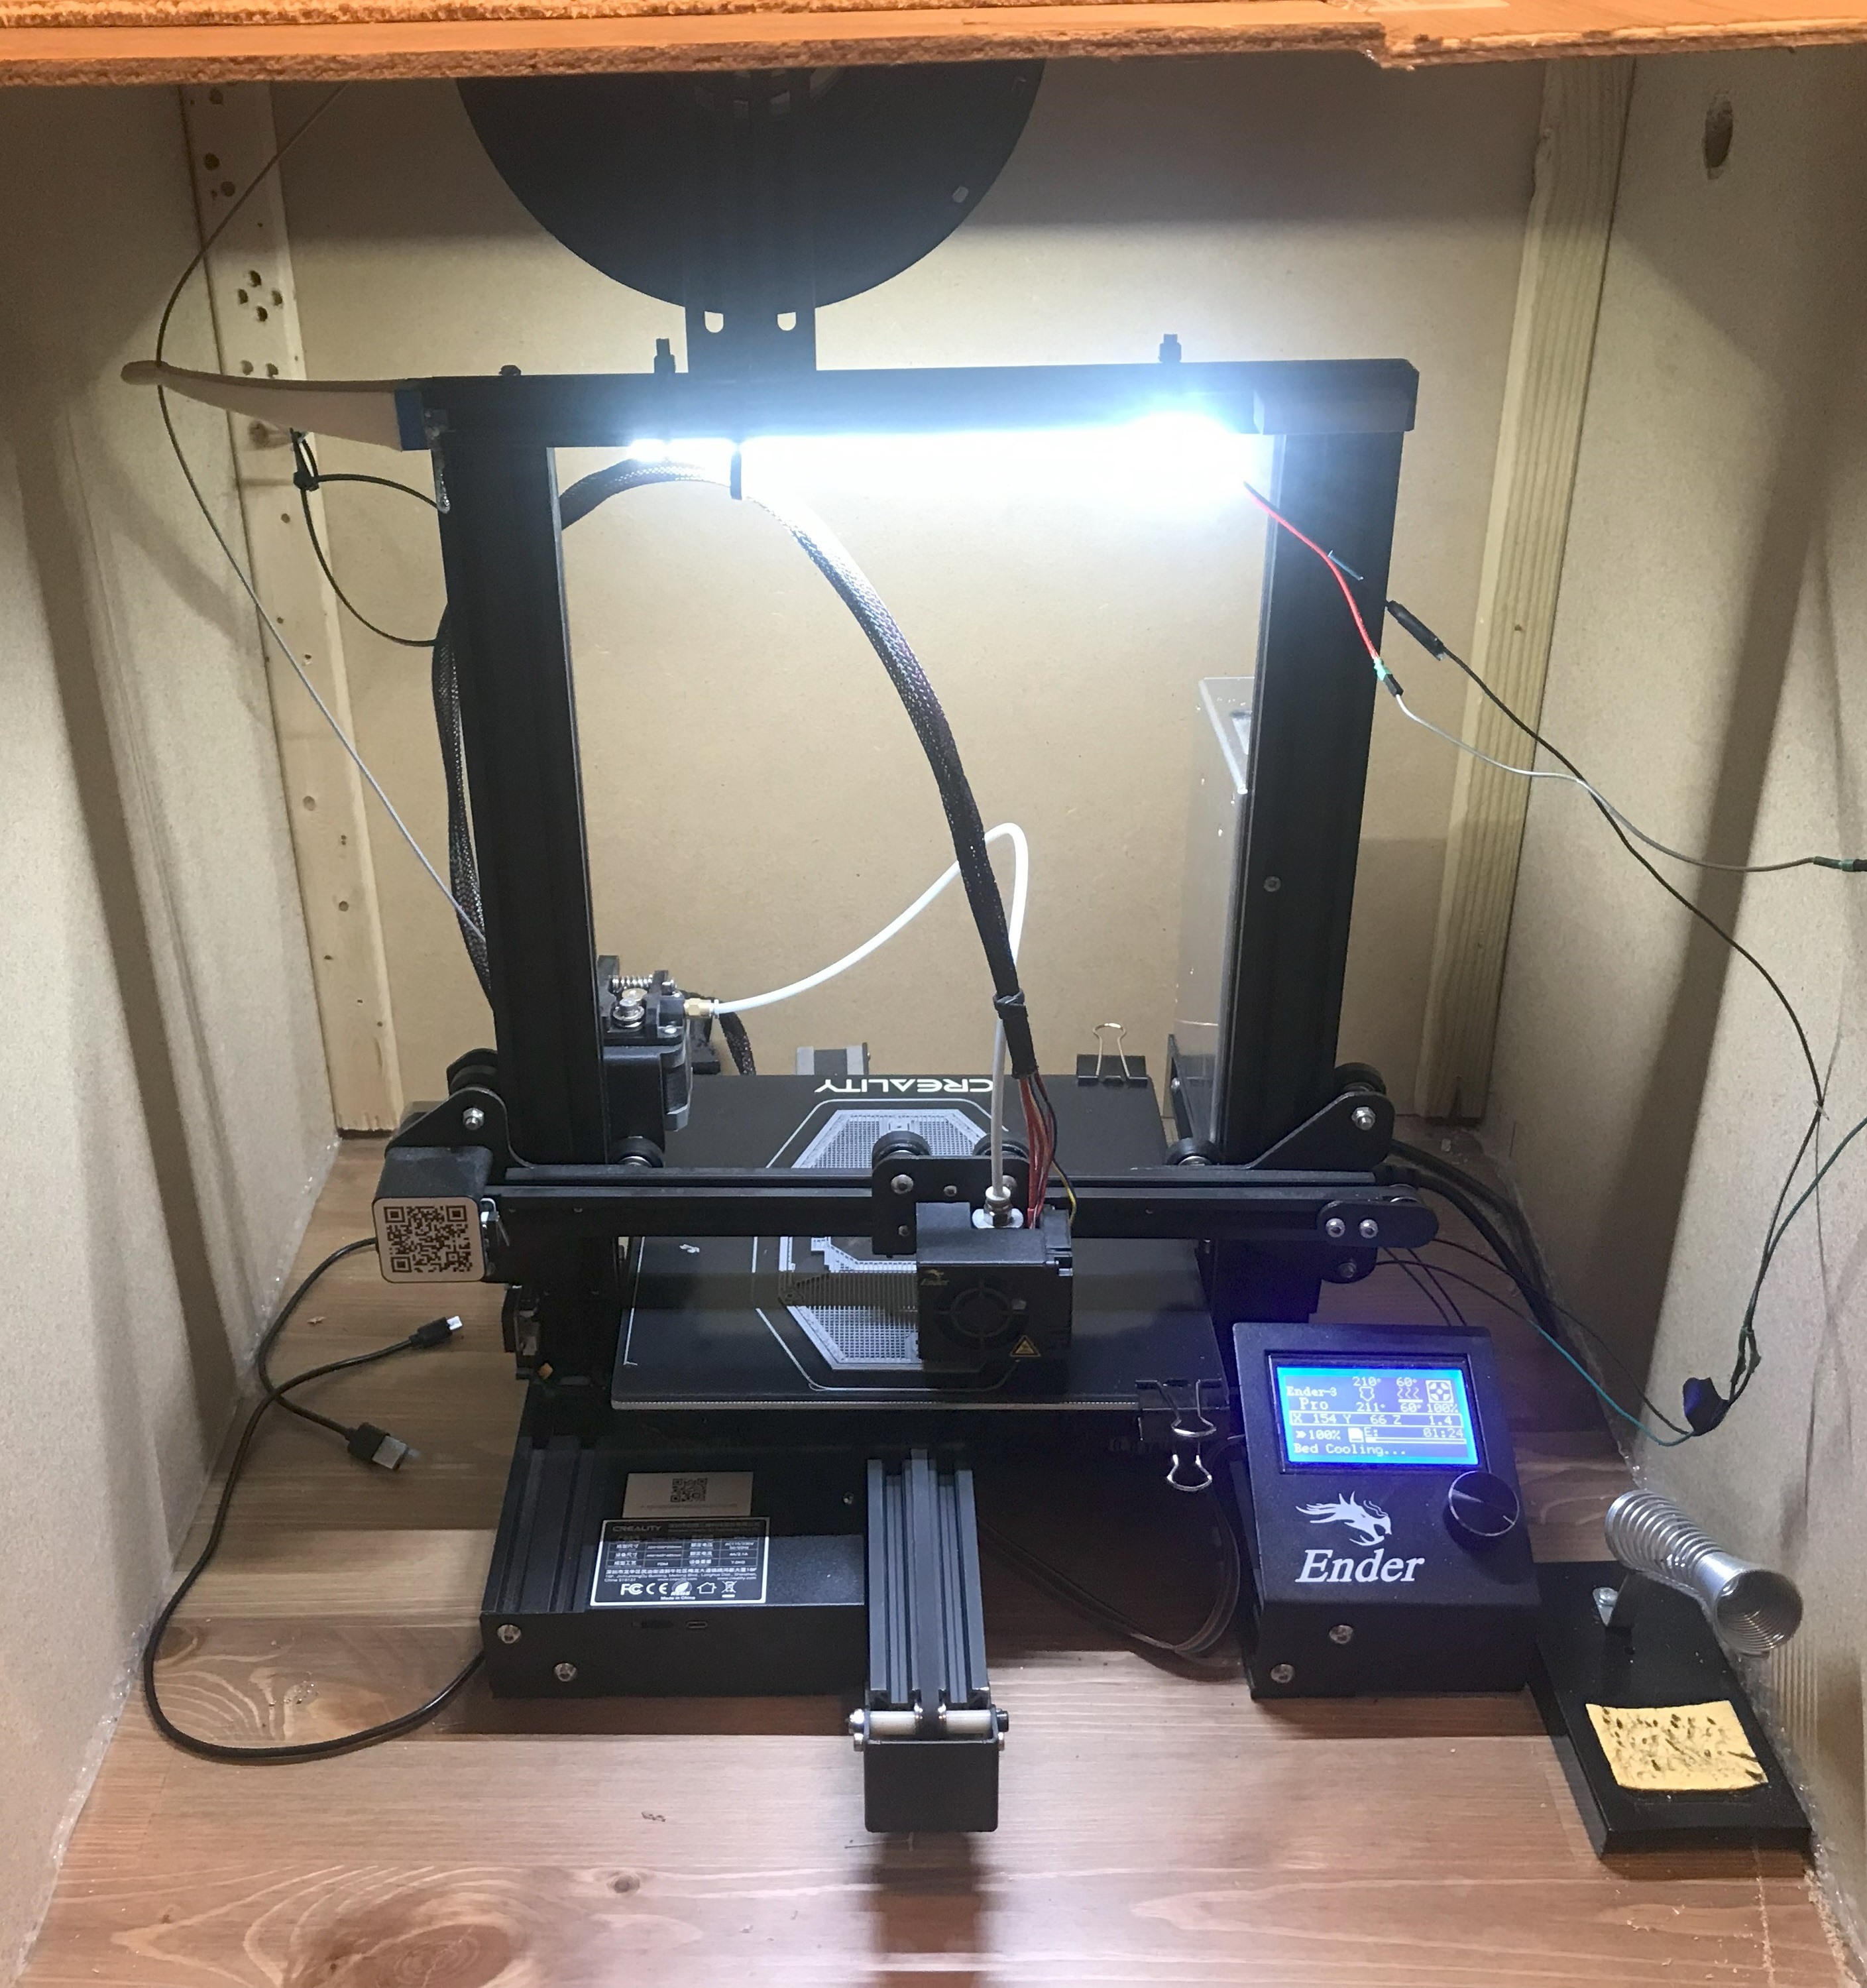
As you can tell, this is far from any kind of “official” enclosure, rather it is just some pieces of wood that keeps the temperature high enough inside for those annoying filaments like ABS. With the fan / filter running the enclosure reaches a maximum temperature of around 108°F/42°C from what I’ve observed. I’ve also brought out some power and ground wires from the printer’s PSU that is running the LED strip you can see in the image. The power wire is first routed through a toggle switch on the side for easy on / off control.
Something I am looking to eventually change about this enclosure is buying some plexiglass for the front piece instead of the wood that is currently there. That will just make it easier to check if a print is warped or not sticking to the bed. OctoPrint does allow for some monitoring this way with the camera I have set up, but at the same time I would like to be able to look at it directly.
Arduino for monitoring temperature
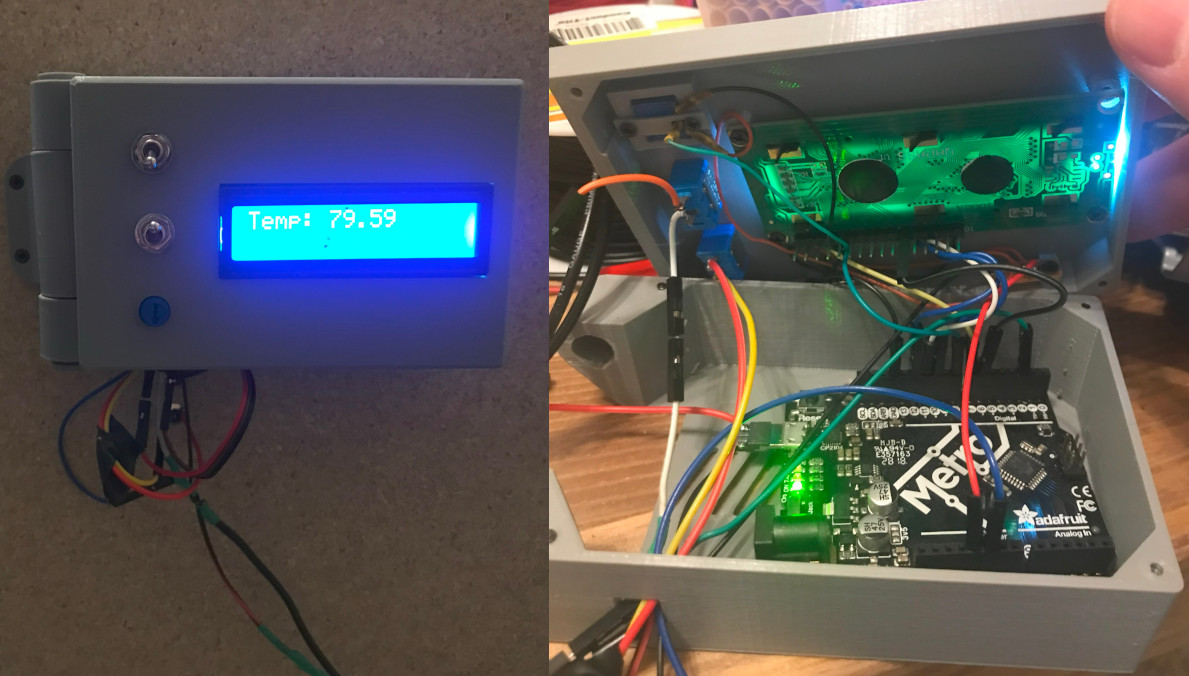
I didn’t really have a need for this initially, but adding the fan filter I’ll mention down below pushed me to make this. You may or may not know this, but ABS filament requires a much higher ambient temperature (hence the enclosure) than the other kinds of filaments I normally use like PLA. After adding the fan I was worried I would be pulling too much heat out of the enclosure, and since I had a spare Arduino, temperature sensor and LCD, I decided to write a quick script that would let me monitor the temperature inside the enclosure:
Hardware used:
*Note: If you don’t want to shell out money for the LCD an alternative I thought of was to use a series of 3-5 LEDs instead. From there you can define parameters of what is too cold or too hot, and then reflect that through which LEDs light up. You can also go with a less powerful microcontroller as well, this sensor isn’t doing too much work after all.
I’m considering adding more sensors in time, but for now the Arduino is only acting as a temperature monitor. To set this up yourself you’ll need the same hardware as I just described or at least similar enough. The .ino script I wrote that interacts with the sensor and LCD can be found here.
3D Model
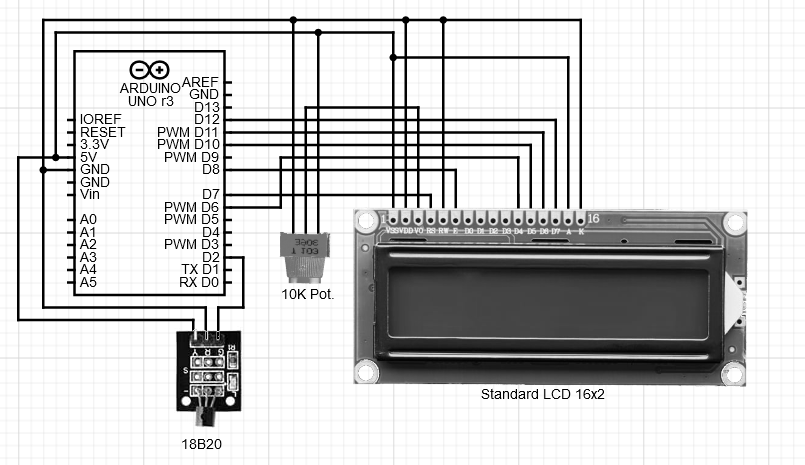
Circuit diagram:
Fan for filtering ABS fumes
When I first started printing with ABS I learned that a) you need a higher ambient temperature (hence the enclosure), and b) it gives off a lot more fumes than PLA and so requires some kind of ventilation or filtering. I realized all I really needed was a fan and some filters after all, and since we were throwing out an old server at work I was able to grab several of its fans before it was scrapped.
Hardware used:
- 1x Dell Server Fan Model PFC0612DE (I got mine from an old server, but they can be purchased individually as well)
- 1x DC12V Manual Four-Wire PWM Fan Speed Motor Controller Board
- 1x SPST Toggle Switch
- 1x DC Power Jack Socket
- 1x 12V 2A DC Power Supply
- Carbon filters (~3/8” thick)
- Wire, solder, soldering iron, some screws, etc.
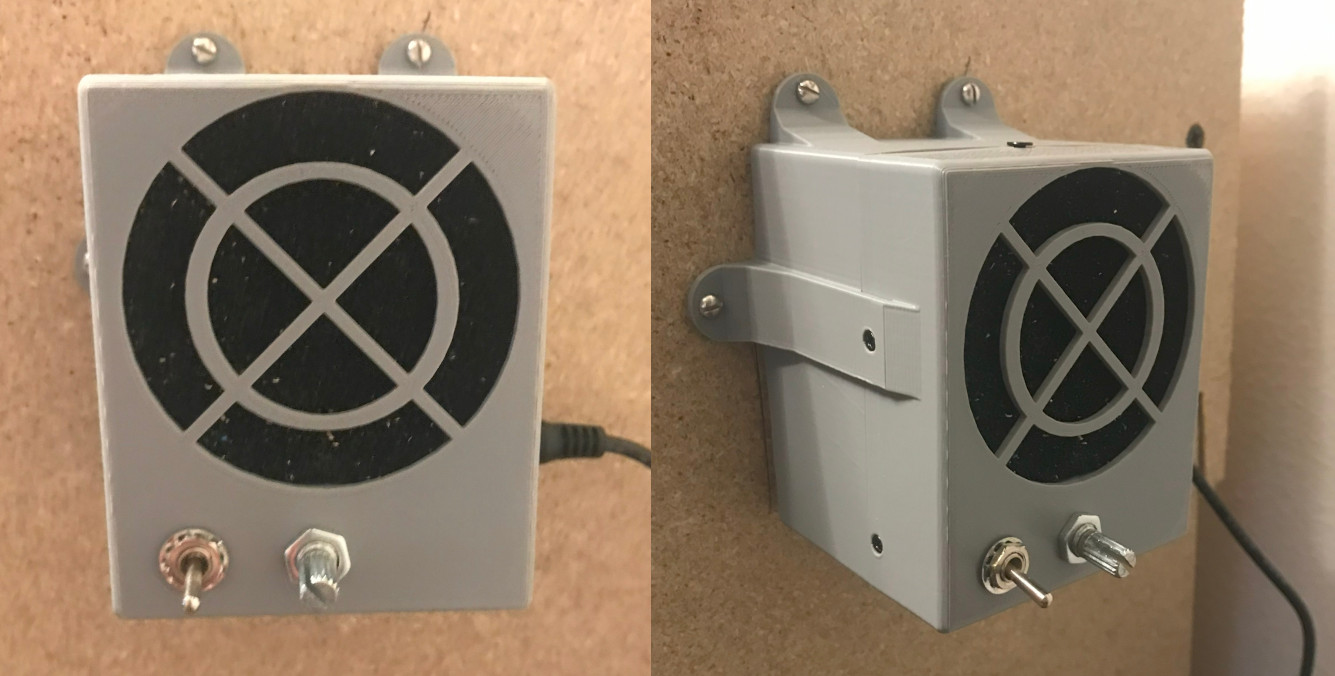
The case I designed to house all of that can be seen here:
MCX backup file for this can be downloaded here. I’ve also made an easy to follow assembly guide / what wires connect where in the video below. This should simplify things if you want to replicate this on your own:
I adopted this same design to work as a solder fume extractor as well. It uses the exact same hardware except for an altered case to shift where the filters are in relation to the fan. Hardware requirements are the same, and links to that model can be found here.
MCX backup file for this can be downloaded here.
OctoPrint
I’ve gotten OctoPrint more or less set up and configured, all I need to do now is print off a case for the RPi and to hold the camera for time lapse captures. It also looks like I will need to flash the Ender’s firmware with a few slight changes to allow OctoPrint to fully work as intended. I’m also setting up OctoDash with a 3.5” touch screen for more control.
I will update this in time, provided I don’t forget…
Print settings
Since this page is all about my printer, here are the settings I’ve been using with success so far. These are for the Ender 3 Pro when slicing with Cura:
PLA filament:
- Initial layer:
- Print speed: 10 mm/s
- Extruder temp: 200.0 °C
- Build plate temp: 70 °C
- Following layers:
- Print speed: 50 mm/s
- Extruder temp: 210 °C
- Build plate temp: 70 °C
ABS filament:
- Initial layer:
- Print speed: 40 mm/s
- Extruder temp: 235 °C
- Build plate temp: 70 °C
- Following layers:
- Print speed: 55 mm/s
- Extruder temp: 235 °C
- Build plate temp: 60 °C
- Retraction distance: 5 mm // Retraction speed: 45mm/s
- Enable print cooling:
False
Also, set the Build Plate Adhesion Type to ‘None’ - leaving this at the default ‘Skirt’ does not allow you to use the full print bed of 220mmx220mm for the Ender 3 Pro.
Anything else not mentioned is using the default settings for the Ender 3 Pro printer.